

Machine embroidery decorates fabric with stitched designs, lettering, and patterns rather than joining pieces together. Regular sewing focuses on seams, while embroidery fills areas with dense stitches, so it depends on stable fabric, the right thread, and careful setup. If you're learning how to use sewing machine for embroidery, you'll need a compatible machine or foot, a hoop, stabilizer, embroidery thread, and a few basic skills such as threading and fabric preparation.
Can You Use a Regular Sewing Machine for Embroidery?
Yes, within limits. Dedicated embroidery machines and combination models have an embroidery unit that moves the hoop automatically and stitches digital designs. A standard sewing machine can't do that, but it can handle free-motion embroidery: you lower the feed dogs, attach a free-motion foot, and guide the fabric by hand to "draw" with thread. Many machines also offer built-in decorative stitches for borders and simple accents. Learning how to use a sewing machine for embroidery this way takes practice but requires little extra equipment.
How to Use an Embroidery Sewing Machine
Start with the basics: insert a fresh embroidery needle, thread the machine with embroidery thread, and wind the bobbin with lightweight bobbin thread. Choose a stabilizer suited to your fabric, then hoop the fabric and stabilizer together so the surface is taut but not stretched.
Next, load your design from the built-in library, a USB stick, or the machine's screen. Attach the hoop to the embroidery arm and use the positioning tools or hoop markings to center the design. Once you start, stay nearby, change thread colors when prompted, and watch for breaks or puckering. After a few projects, knowing how to use embroidery sewing machine controls becomes second nature.
How to Use Sewing Machine Embroidery Step by Step
-
Choose fabric and stabilizer. Tear-away suits stable wovens, cut-away works for knits, and wash-away is ideal for sheer fabrics.
-
Thread the machine correctly. Keep the presser foot raised so the thread seats properly in the tension discs.
-
Attach the embroidery unit or foot. Use the embroidery unit for digital designs or a free-motion foot for hand-guided work.
-
Hoop the fabric. Keep it smooth, with the grain straight.
-
Select the design and adjust settings. Set size, orientation, and speed; slow down for dense designs.
-
Begin stitching and check tension. On the back of satin stitches, a narrow line of bobbin thread should show in the center, with none visible on the front.
How to Use an Embroidery Foot on a Sewing Machine
An embroidery or free-motion foot hovers just above the fabric, letting you move it in any direction while preventing it from lifting with the needle. To learn how to use an embroidery foot on a sewing machine, turn the machine off, remove the standard foot, and attach the free-motion foot according to your manual. Lower or cover the feed dogs, select a straight stitch, and set the stitch length to zero.
With the fabric hooped, move it smoothly and steadily. Stitch length now depends on how fast you move your hands relative to machine speed, so a moderate speed with calm, even movements produces the most consistent results.
How to Use Embroidery on Sewing Machine for Different Fabrics
Lightweight fabrics such as silk, organza, and voile need a fine needle, a wash-away or lightweight cut-away stabilizer, and less dense designs.
Cotton and medium-weight fabrics are the easiest to work with. A size 75/11 embroidery needle and medium tear-away stabilizer handle most designs.
Denim and heavier materials need a larger needle, a sturdy stabilizer, a slower speed, and a hoop that grips thick fabric securely.
Needle, stabilizer, thread, and machine settings work as a system. A mismatch in any one leads to puckering, skipped stitches, or broken thread.
Do You Need to Know How to Sew to Use an Embroidery Machine?
If you're wondering do you need to know how to sew to use an embroidery machine, the short answer is no. A computerized machine does the stitching, and your job is preparation: threading, winding bobbins, choosing needles, and hooping fabric correctly. So, do you have to know how to sew to use an embroidery machine? Not strictly, but sewing experience makes troubleshooting easier and helps you turn embroidered pieces into finished projects.
Read Also: How Prizzi Supports University Sewing Programs: The Cal State Fullerton Workstation Rebuild
Common Embroidery Mistakes to Avoid
-
Using the wrong stabilizer, which causes puckering and distorted designs.
-
Choosing an unsuitable needle or thread, leading to breaks and skipped stitches.
-
Placing fabric poorly in the hoop, resulting in crooked designs.
-
Setting incorrect thread tension, which creates loops or visible bobbin thread.
-
Moving fabric too quickly during free-motion embroidery.
-
Stitching dense designs on thin or stretchy fabrics.
Tips for Better Embroidery Quality
Always test a design on a scrap of the same fabric before stitching the final piece. Keep the fabric stable and avoid pulling on the hoop while the machine runs. Use quality embroidery thread and replace needles regularly. Clean lint from the bobbin area after each project and follow the maintenance schedule in your manual.
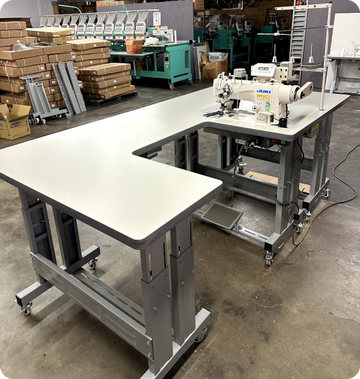
Work on a sturdy sewing table so vibration doesn't affect stitch quality. Industrial and commercial embroidery equipment has its own service requirements, but for home machines, following manufacturer guidelines for accessories and care also helps keep your warranty valid.
Conclusion
Learning how to use the embroidery on a sewing machine comes down to a few essentials: match the needle, thread, and stabilizer to your fabric, hoop carefully, set the machine correctly, and monitor the stitching. Whether you work with a dedicated embroidery machine or a free-motion foot, regular practice and proper setup are what deliver clean, consistent results.